Change State and/or Federal Deductions
Select Payroll Menu>>File Update>>Company Information.
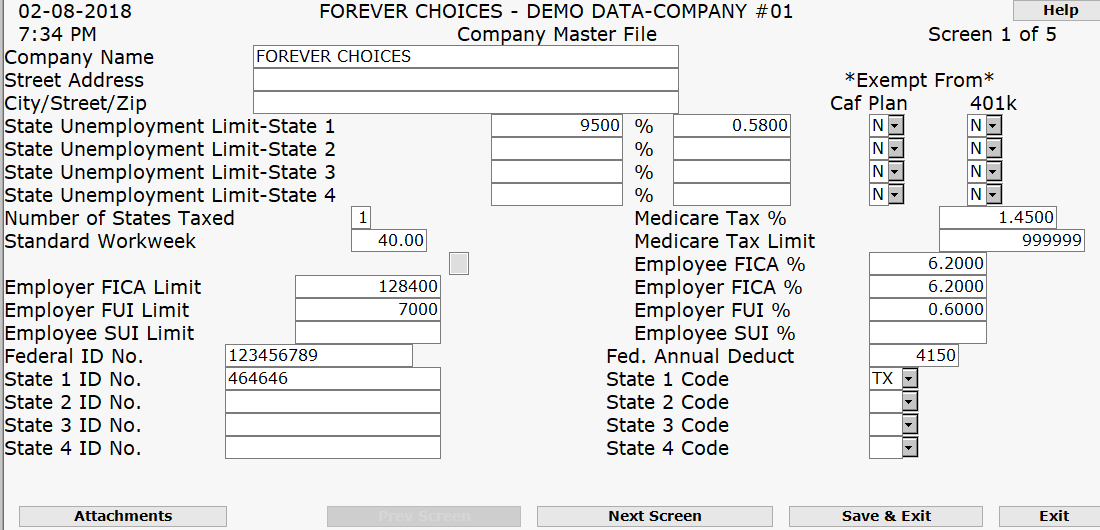
STATE UNEMPLOYMENT LIMIT-STATE 1 Exempt From CAF PLAN 401K
STATE UNEMPLOYMENT LIMIT-STATE 2
STATE UNEMPLOYMENT LIMIT-STATE 3
STATE UNEMPLOYMENT LIMIT-STATE 4
PRESS ENTER TO ADVANCE TO SECOND SCREEN
This screen allows you to setup voluntary deductions for employees' pay for such items as insurance, uniforms, union dues, etc. These deductions are in addition to the non-voluntary deductions such as FICA, federal and state withholdings. Entering these types of deductions here will not automatically deduct this from any employee checks. On the Employee Master File, there is a field for each employee that you can list the types of deductions by entering the number assigned to that type of deduction.
Complete the fields on this screen. (Click on a field name for an overview. An asterisk (*) denotes required fields.)
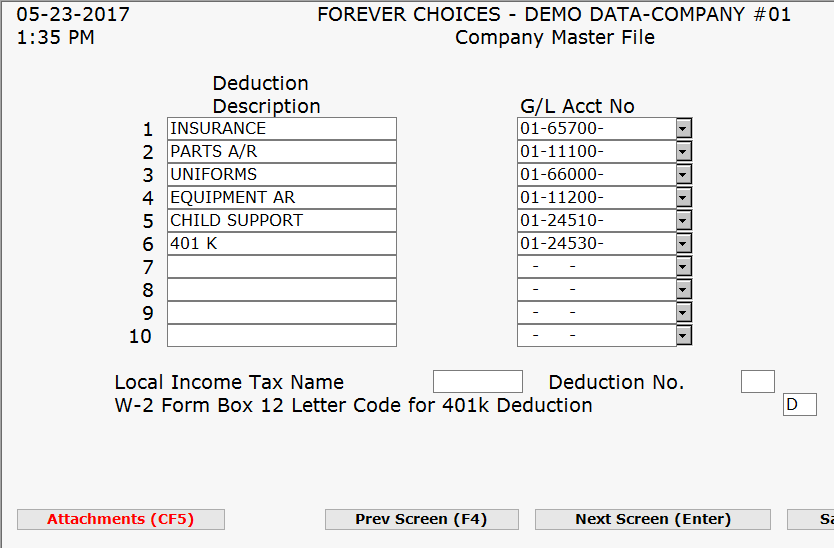
W-2 Form Box 12 Letter Code for 401K Deductions
PRESS ENTER TO ADVANCE TO THIRD SCREEN
Each of the listed accounts on this screen will be posted to when a corresponding transaction occurs in the Payroll system.
You must enter the account number accurately here. You are not prevented from entering an account number that does not correspond with the displayed account description. If a valid account number is entered that does not match the account description, you could mistakenly be posting to the wrong account.
Complete the fields on this screen. (Click on a field name for an overview. An asterisk (*) denotes required fields.)
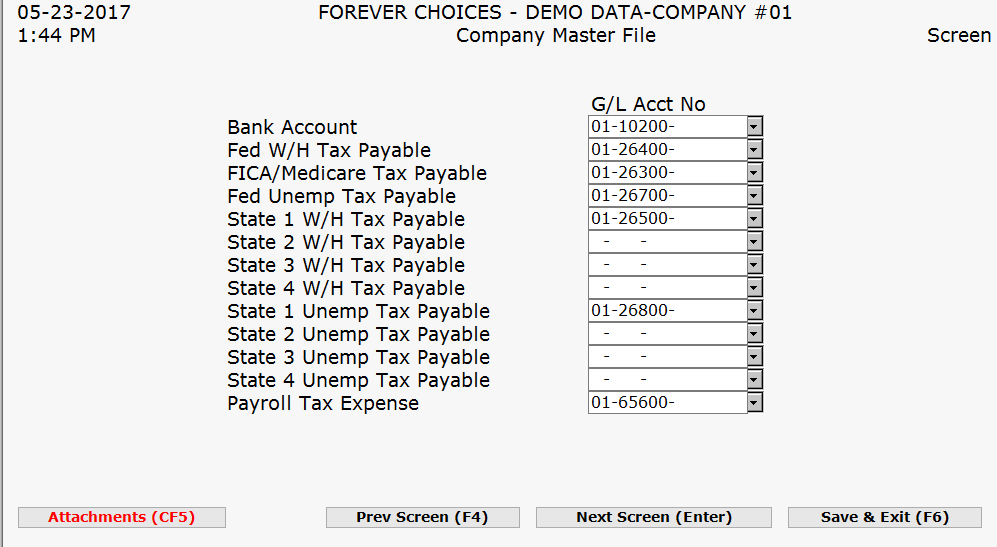
PRESS ENTER TO ADVANCE TO FOURTH SCREEN
This screen allows you to track the amount of gross salaries paid to the various departments. For General Ledger purposes and for management summary purposes, you may define up to twenty (20) different department classifications.
When entering new employees, you must place the employee in a department by referencing a relative location (1-20) of each department. A pop-up list of the departments that you specify here is available in the Employee File.
Complete the fields on this screen. (Click on a field name for an overview. An asterisk (*) denotes required fields.)
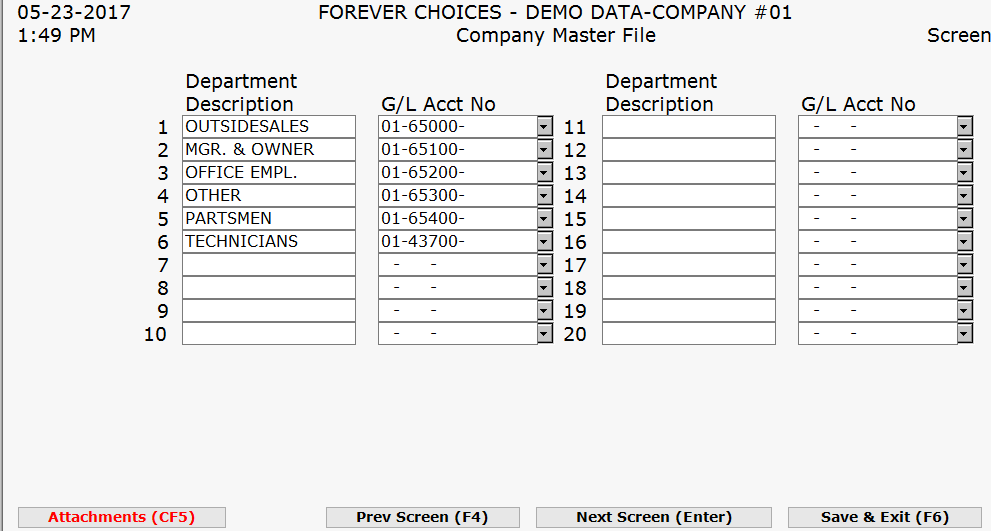
PRESS ENTER TO ADVANCE TO FIFTH SCREEN
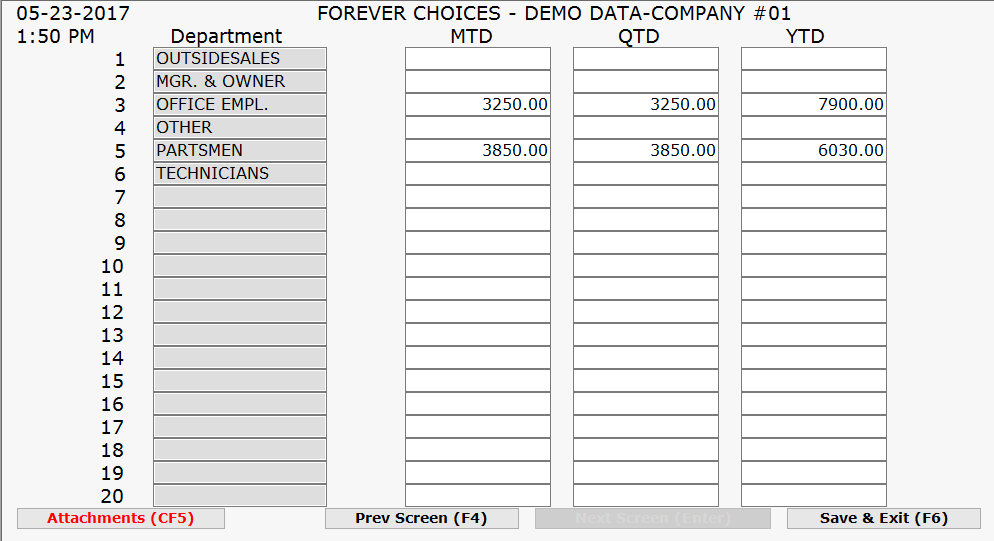
This screen is primarily for information purposes only. It shows you the accumulative month-to-date (MTD), quarter-to-date (QTD) and year-to-date (YTD) gross salaries for each department. If you implement the payroll system during a calendar year and this information is available, you may enter this information manually.
Press ENTER when you are ready to exit and save the information on this screen.
Change State and/or Federal Deductions
Periodically, the state and/or federal unemployment information may change. In order to update this in the BSS system, follow these steps.
Select Payroll Menu>>File Update>>Company Information.
On the first screen, using the arrow keys, highlight the fields necessary to modify.
After making the changes, press F6 to return to the main menu or press ENTER to continue to the next screen in order to make changes to it or the succeeding screens.
After pressing ENTER on the last screen, you will be returned to the main menu.